
- First of all I will tell you how to create web service(SQL database) in Visual Studio with in 5 steps
File--->web Site(click) --->ASP .Net web Service


Step 2 : Create a Table
If Server Explorer is not appear ,then press ctrl + alt + s.Then add your data connection according to
your database.
Then add new table to your database.

 |
| create your table |
 |
| Save your table with table name |


Step 3 : add a new class call connectionManager

 |
| give a class name :- ConnectionManager.Class |
 |
| click "Yes" button |
//----------------------------------------
using System;
using System.Data;
using System.Configuration;
using System.Linq;
using System.Web;
using System.Web.Security;
using System.Web.UI;
using System.Web.UI.HtmlControls;
using System.Web.UI.WebControls;
using System.Web.UI.WebControls.WebParts;
using System.Xml.Linq;
using System.Data.SqlClient;
public class ConnectionManager
{
public static SqlConnection NewCon;
public static string ConStr =
"Data Source=ADRIAN-PC\\SQLEXPRESS;Initial Catalog=SimpleLife;Integrated Security=True";
public static SqlConnection GetConnection()
{
NewCon = new SqlConnection(ConStr);
return NewCon;
}
}
//------------------------------------------------------------------------
in here you have to change your ConStr according to your database connection
Step 4 : add a new web method

Double click Service.cs -->Then type following code(copy & paste)
//----------------------------------------------------
using System;
using System.Linq;
using System.Web;
using System.Web.Services;
using System.Web.Services.Protocols;
using System.Xml.Linq;
using System.Data.SqlClient;
using System.Data;
[WebService(Namespace = "http://tempuri.org/")]
[WebServiceBinding(ConformsTo = WsiProfiles.BasicProfile1_1)]
public class Service : System.Web.Services.WebService
{
public Service () {
}
[WebMethod]
public string findContact(string eid) {
return getContact(eid);
}
public String getContact(String eid)
{
SqlConnection conn;
conn = ConnectionManager.GetConnection();
conn.Open();
SqlCommand newCmd = conn.CreateCommand();
newCmd.CommandType = CommandType.Text;
newCmd.CommandText = "select Name from dbo.StudentContact where studentNo='" + eid + "'";
SqlDataReader sdr = newCmd.ExecuteReader();
String address=null;
if (sdr.Read())
{
address = sdr.GetValue(0).ToString();
}
conn.Close();
return address;
}
}
//------------------------------------------------------
Step 5 : Run your web service
 | |
| This your web service |
Now you can see your findContact( ) WEB METHOD will appear on webs service
Now we can check this web service is work correctly, there for click findContact(light blue color) on web service.

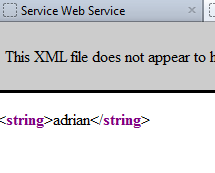
now this web service is work properly. according to the student no it will appear student name.
Now I will tell you how to access this web service in Android
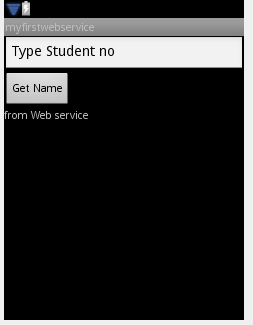
Step 1 : create your android project and create this main XML file
<?xml version="1.0" encoding="utf-8"?>
<LinearLayout xmlns:android="http://schemas.android.com/apk/res/android"
android:orientation="vertical"
android:layout_width="fill_parent"
android:layout_height="fill_parent"
>
<EditText
android:layout_width="match_parent"
android:layout_height="wrap_content"
android:text="Type Student no"
android:id="@+id/editText1">
</EditText>
<Button
android:text="Get Name"
android:id="@+id/button1"
android:layout_width="wrap_content"
android:layout_height="wrap_content">
</Button>
<TextView
android:text="from Web service"
android:id="@+id/textView1"
android:layout_width="wrap_content"
android:layout_height="wrap_content">
</TextView>
</LinearLayout>
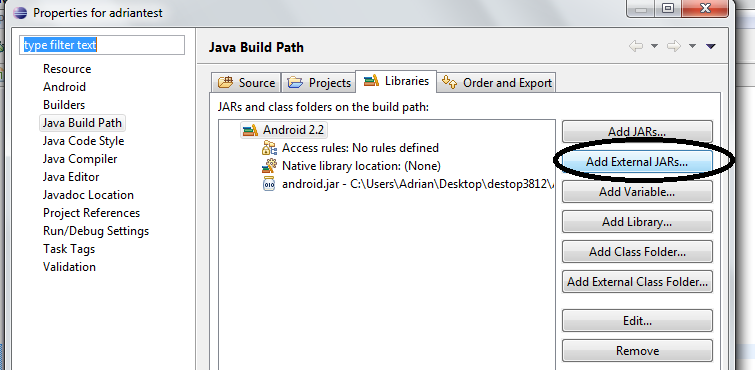
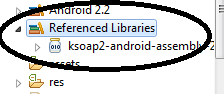
Step 2 : Download (http://sourceforge.net/projects/ksoap2/) KSOAP from the internet and locate on your hard disk.And add to the to your Android Project


Step 3 :Then Type following code in main activity .java class (according to your Main Activity class(.java) )which class you decide to display data.
package com.webservice; //In Here Your package com." your one ";
import org.ksoap2.SoapEnvelope;
import org.ksoap2.serialization.PropertyInfo;
import org.ksoap2.serialization.SoapObject;
import org.ksoap2.serialization.SoapSerializationEnvelope;
import org.ksoap2.transport.HttpTransportSE;
import android.app.Activity;
import android.content.Intent;
import android.os.Bundle;
import android.view.View;
import android.view.View.OnClickListener;
import android.widget.Button;
import android.widget.EditText;
import android.widget.TextView;
public class Main extends Activity
{
/** Called when the activity is first created. */
private static final String SOAP_ACTION = "http://tempuri.org/findContact";
private static final String OPERATION_NAME = "findContact";// your webservice web method name
private static final String WSDL_TARGET_NAMESPACE = "http://tempuri.org/";
private static final String SOAP_ADDRESS = "http://10.0.2.2:1506/WebSite3/Service.asmx";
// for the SOAP_ADDRESS, run your web service & see
//your web service Url :1506/WebSite3/Service.asmx ,1052 will be change according to your PC
TextView tvData1;
EditText edata;
Button button;
String studentNo;
//http://localhost:1827/WebSite1/Service.asmx/HelloWorld
//http://10.0.2.2:1827/WebSite1/Service.asmx
@Override
public void onCreate(Bundle savedInstanceState) {
super.onCreate(savedInstanceState);
setContentView(R.layout.main);
tvData1 = (TextView)findViewById(R.id.textView1);
button=(Button)findViewById(R.id.button1);
button.setOnClickListener(new OnClickListener() {
public void onClick(View v) {
SoapObject request = new SoapObject(WSDL_TARGET_NAMESPACE, OPERATION_NAME);
PropertyInfo propertyInfo = new PropertyInfo();
propertyInfo.type = PropertyInfo.STRING_CLASS;
propertyInfo.name = "eid";
edata =(EditText)findViewById(R.id.editText1);
studentNo=edata.getText().toString();
request.addProperty(propertyInfo, studentNo);
SoapSerializationEnvelope envelope = new SoapSerializationEnvelope(
SoapEnvelope.VER11);
envelope.dotNet = true;
envelope.setOutputSoapObject(request);
HttpTransportSE httpTransport = new HttpTransportSE(SOAP_ADDRESS);
try {
httpTransport.call(SOAP_ACTION, envelope);
Object response = envelope.getResponse();
tvData1.setText(response.toString());
} catch (Exception exception) {
tvData1.setText(exception.toString()+" Or enter number is not Available!");
}
tvData1 = (TextView)findViewById(R.id.textView1);
}
});
//client = new DefaultHttpClient();
//new Read().execute("text");
}
}
Step 4 : Add User Permission to Manifest
" Internet User Permission "
Step 5 : Run your App
 |
| type Student No then click the button |

Good Luck!